How to Use a Verified NFT as Your Twitter PFP

Twitter recently announced the addition of a premium feature that allows Twitter Blue users to use NFTs in their crypto wallets as their profile pictures (pfps) on the social media platform. The feature can only be used with the Twitter mobile app on iOS right now, but it is expected to be rolled out to Android and desktop users soon.
Twitter Blue is a monthly subscription ($2.99/month) that gives early access to premium features to subscribers. Current features include longer videos, editing Tweets prior sending them, and now crypto wallet connection for hexagonal profile pictures. All of these features are expected to be available eventually for all Twitter users.
gm!
— Twitter Blue (@TwitterBlue) January 20, 2022
You asked (a lot), so we made it. Now rolling out in Labs: NFT Profile Pictures on iOS pic.twitter.com/HFyspS4cQW
How to Use Your NFT as Your Twitter PFP (Step-by-Step Guide)
This step-by-step guide walks you through the basics to safely connect your crypto wallet to Twitter for NFT verification.
Step 1: Edit Your Profile
To edit your Twitter profile, open the Twitter app, click on your current profile picture in the top left corner to open the sidebar, and then click edit profile. As of this writing, only the main profile picture can be updated, not the banner. When you tap on your current profile picture, two options will pop up: upload photo or choose NFT.
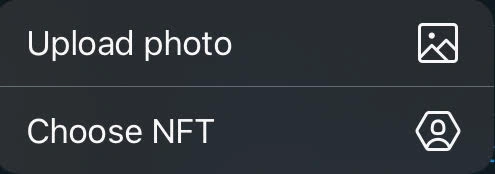
Select “Choose NFT."
Step 2: Subscribe to Twitter Blue (if not already)
As mentioned earlier, this feature is currently exclusive to Twitter Blue subscribers. If you are already a subscriber skip to Step 3. If not, you'll see an option to sign up for the premium subscription.
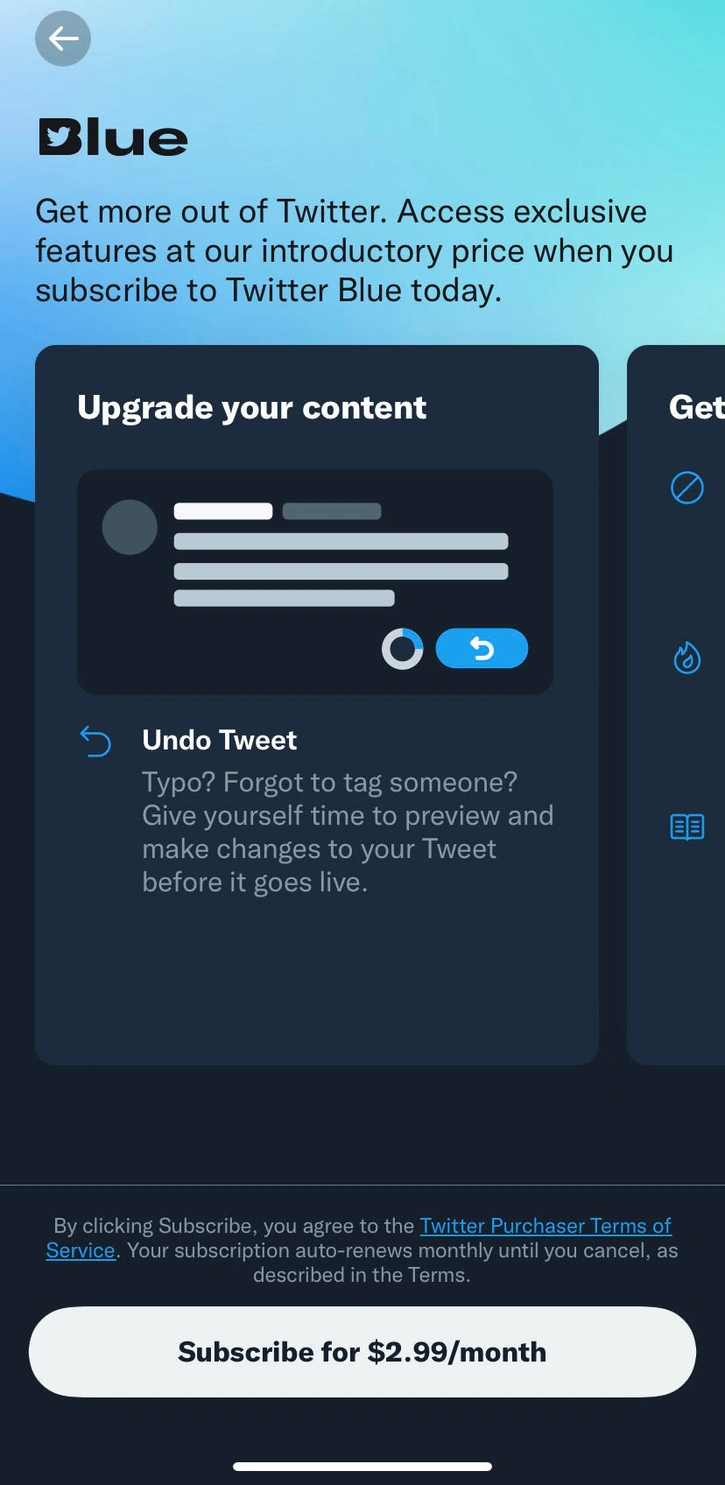
Simply click on the subscribe button and you will get a familiar popup asking you to verify your account and confirm your subscription. Double tap the button, wait for it to be confirmed, and move onto the next step.
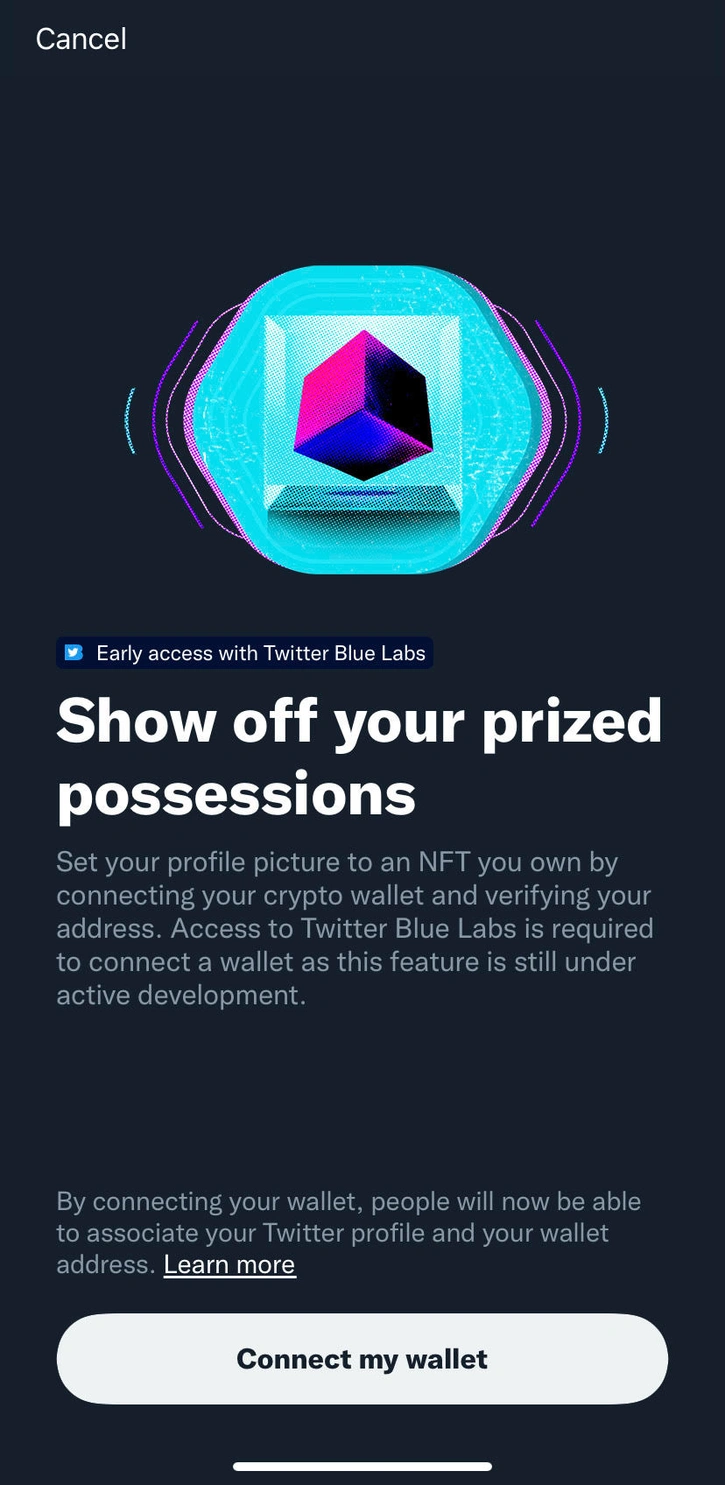
Step 3: Connect Your Crypto Wallet
Congratulations! You are now a Twitter Blue subscriber and able to utilize all the benefits and premium features that Twitter Blue has to offer. Now let's verify your NFT as your Twitter profile picture. Next, you'll see a screen that prompts you to connect a wallet.
If for some reason you don’t see this screen, simply go back to Step 1 and click “Choose NFT” again. If you are both a Twitter Blue subscriber and have clicked to choose your NFT but still don’t see the above screen, then you probably already connected your wallet and can simply move on to selecting your NFT and setting your profile picture.
For the rest of the first-time users, tap “Connect my wallet” and it will bring up a number of options, including: Coinbase Wallet, Rainbow, MetaMask, Ledger Live, Argent, and Trust Wallet.
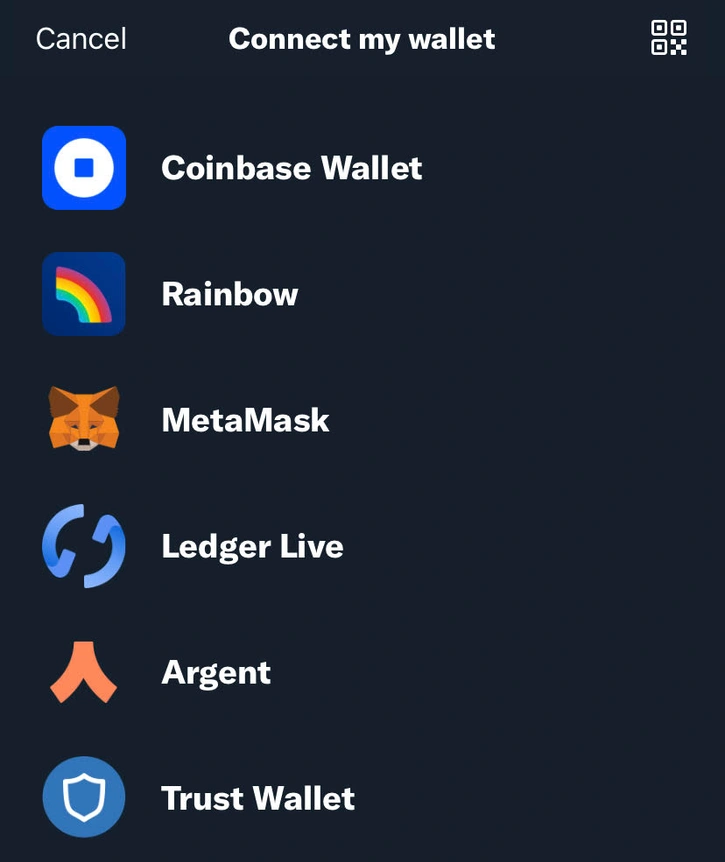
You will need to have one of these wallet apps downloaded to your phone. Click on your wallet of choice, and you'll be redirected to that wallet's app.
In this example we’ll use MetaMask, as it is currently the most popular option. Once your app has been opened a message should automatically pop up. Simply tap the “Sign” button and you will be redirected back to the Twitter app.
Step 4: Choose Your NFT
Now, you should finally be seeing a page with your NFT collection. This currently defaults to OpenSea, and right now, Ethereum-based NFTs are the only eligible options. More blockchains and marketplaces should be supported in the future.
Scroll through your owned NFTs, pick your favorite, click "Done," and your pfp will be updated with your verified NFT! Verified NFTs have a hexagonal shape, as opposed to the regular circular shape. You cannot crop or move your NFT once selected, so make sure it fits nicely in the space provided.
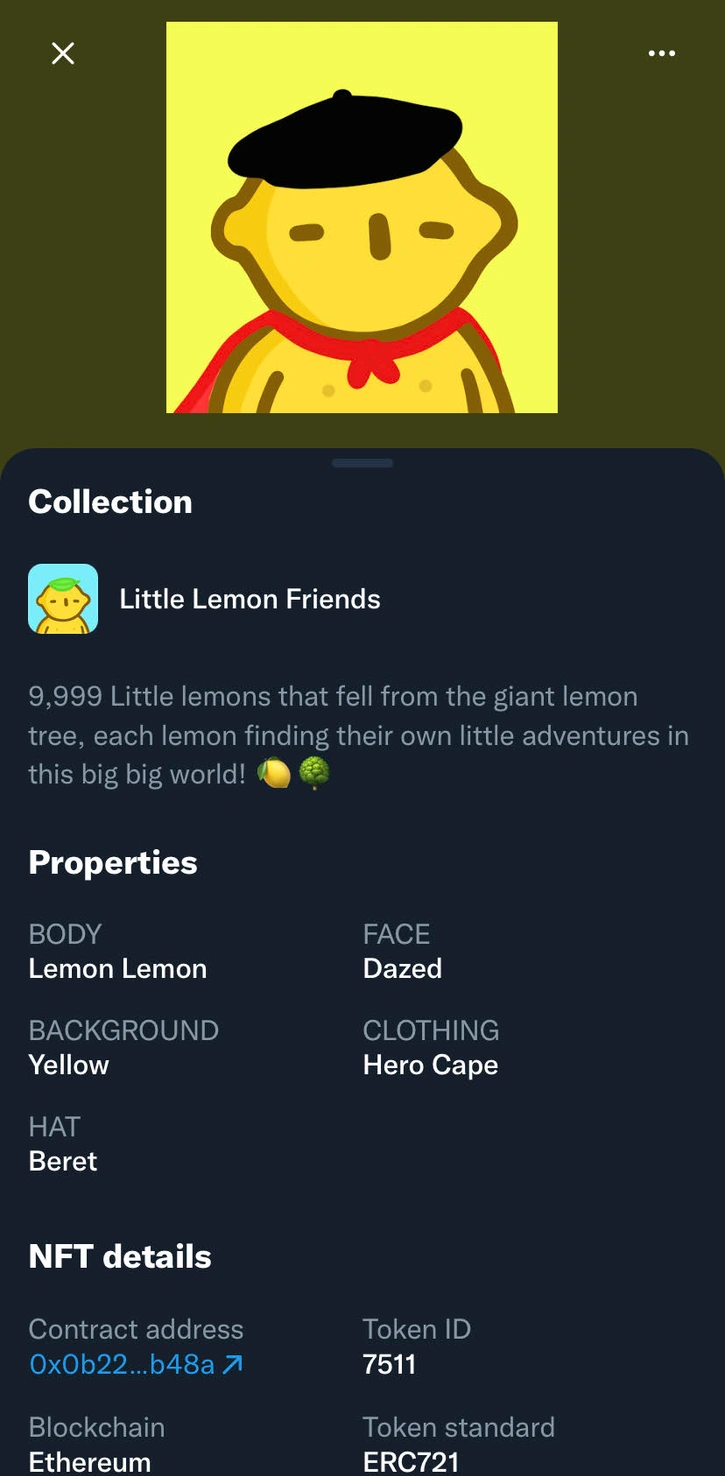
Viewing NFT Details on Twitter
Whenever someone visits your profile page, they will see your new verified NFT profile picture in its hexagonal form. When clicked, Twitter shows them (or you) the full NFT image along with its name and serial, collection title, and blockchain symbol. You can then tap on “View NFT Details” and see all of the details about the NFT.
Connecting to Twitter With a Hardware Wallet
If you have a specific NFT that you’d like to use as your Twitter profile picture safely stored on a hardware wallet (like Ledger or Trezor), you do not need to transfer the NFT back to your mobile wallet. Instead, when you see the connect wallet screen, you can click the QR code in the top right corner of the screen, and you will be given a wallet connect link. You can use this link on your desktop to follow the instructions to connect your hardware wallet to the QR code. Then, back on your iPhone, simply follow the prompts to connect to the hardware wallet through the link and go back to Step 4.
What Happens When You Sell Your Twitter NFT PFP?
If you subsequently sell your NFT that you had been using as your Twitter profile picture, it remains to be seen if and when Twitter will actually forcibly remove it from your profile. When attempting to change your profile picture, any NFT that has been sold will no longer be in your wallet. Therefore, it will not be connected to your account and you won’t be able to add it.