How Do I Make an NFT? A 5-Step Guide to Make NFT Art

Advances in technology bring new artistic mediums, and with the emergence of blockchain technology comes NFT art. From Super Bowl commercials to Saturday Night Live, it’s nearly impossible to ignore the hype surrounding NFTs. So how exactly do you make one?
If I lost you in the first sentence with “blockchain technology,” don’t worry. Whether you’re new to the space or a collector hoping to create a collection of your own, consider this your ultimate guide on how to make an NFT. It’ll cover everything you need to make and sell NFT art and where to find those tools. And if your most recent artistic endeavor happens to be a crude oil pastel from middle school that’s gathering dust in your parents’ attic, that’s more than okay. Let’s dive in and learn how to make NFT art.
Table of Contents
- What Do You Need to Make an NFT?
- Step 1: Choose Your NFT Platform
- Step 2: Design Your NFT Concept
- Step 3: Mint and Sell Your NFT
- Step 4: Build a Community
- Step 5: Create More NFT Art
What Do You Need to Make an NFT?
You’ll need to understand blockchain technology, have a digital wallet, and purchase cryptocurrency.
What is the Blockchain?
Blockchain technology provides a secure method for recording information that makes it nearly impossible to alter. Think back to when purchases were tracked with handwritten ledgers prone to human error and manipulation. Blockchain is a secure digitization of that process.
The digitally authenticated chain of ownership sufficiently blocks attempts to hack or cheat the system.
One of the most popular blockchains is Ethereum, not to be confused with the native token it is powered by - Ether (ETH). By using a digital wallet, you'll be able to access and utilize the Ethereum blockchain, decentralized applications, and more. Keep in mind, individual wallets will support different blockchains and cryptocurrencies. So how do you choose the right digital wallet?
Top Features to Look for When Choosing Your Digital Wallet:
Security: Choose a wallet with security in mind. Accessing digital wallets is unlike most traditional web applications, you will be required to set a password and store a secret recovery phrase, also known as a private key. This secret recovery phrase, sometimes called a seed recovery phrase, will provide the only means to decrypt your wallet without a password, so store it safely and never give it out.
Accessibility: Digital wallets with polished user interfaces and accessible browser extensions allow for easier use, especially for beginners.
Compatibility: To eventually sell the NFT you create, you'll need to ensure your wallet is compatible with your preferred NFT marketplace - we'll help you with that choice later on. Marketplaces list their supported wallets on their websites, so determining compatibility isn’t tricky. For an example, check out OpenSea’s compatible wallets.
MetaMask is a good example of a wallet with all these features. It’s compatible with marketplaces like Rarible, OpenSea, Nifty Gateway, SuperRare, and more. This beginner’s guide to Metamask teaches setup and use.
Once you’ve got your wallet, it’s time to buy some cryptocurrency. Some marketplaces charge fees up front before you can mint your NFT, and we’ll cover that more in the next section. However, if you’d rather hold off on buying crypto until you know exactly how much you’ll need, that’s fine too.
When you’re ready to purchase, there are multiple options. Some wallets have an option to buy directly in wallet, most commonly by debit card. While this is great for simplicity, it should be noted that there are often limits on the amount of cryptocurrency you can purchase at one time. Additionally, you can use a popular centralized exchange like Coinbase to purchase cryptocurrency.
If you haven't previously used Coinbase, we have a guide on how to buy, sell, and transfer crypto using the platform.
Now to the NFT building!
Step 1: Choose Your NFT Platform
The marketplace you choose can limit your wallet options, so consider this section with the prior in mind. Before we look at essential differences between top marketplaces, let’s go over some concepts you are bound to encounter in your research.
Primary Sales and Gas Fees
Primary sales, also known as mint sales, refer to the first sale of an NFT. Some marketplaces require paying upfront gas fees to mint your NFT before your primary sale; these fees compensate for all the computing energy powering the blockchain.
Consequently, gas fees are higher when marketplaces are busy, and the inverse is also true. Luckily, you can save money selling NFTs by being mindful of gas fees and their fluctuations.
Ethereum has become notorious for high gas prices needed given the demand and consistent use of the blockchain. If you want to learn more about how these gas fees work, read this article on Ethereum gas fees in crypto.
Other marketplaces allow for lazy minting - meaning you don’t have to pay gas fees to mint before your primary sale. With lazy minting, your NFT is available to purchase “off-chain” or outside the blockchain. You can either include the gas fee in the price of your NFT or have the buyer cover gas fees at the time of purchase. This is a great way to get started if you're just beginning in your NFT creation journey.
Secondary Sales and Royalties
Secondary sales apply to every time your NFT is resold in a marketplace. You can set royalties, which generate creator earnings, on every secondary sale of your NFT art. Depending on the platform, you’ll determine your royalties before you mint or before your primary sale.
Many platforms will cap the amount of royalties you can obtain, which isn't necessarily a bad thing. If royalties are set too high, prospective buyers may be less likely to make an investment in your art or collectible. Typically, royalties on secondary sales are between five and ten percent, and most marketplaces don't cap royalties below ten percent, so beware of choosing a platform for high-royalty options alone.
Marketplace Fees
Whenever someone buys or sells an NFT, most marketplaces will take a percentage of that transaction. Some platforms, like SuperRare, require additional minting fees as well. Marketplace fees and gas fees can rack up the cost of minting and selling an NFT, so compare marketplace fees wisely to avoid losing money on your sale.
Here are some popular marketplaces along with their relevant information; you’ll want to be on the lookout for these listed differences as you research other platforms. Most importantly, look for compatibility between your preferred wallet and marketplaces' supported blockchains.
The platform fees below, unless otherwise specified, apply to the percentage a marketplace takes every time someone buys or sells an NFT.
OpenSea
- Supported blockchain(s): Ethereum, Polygon, Klatyn, Solana
- Platform Fees: 2.5%
- Lazy Minting: Yes
- Royalties: up to 10%
- File Size Limit: 100 MB
- Currently Supported File Types: JPG, PNG, GIF, SVG, MP4, WEBM, MP3, WAV, OGG, GLB, GLTF
Rarible
- Supported blockchain(s): Ethereum, Polygon, Flow, Tezos
- Platform Fees: 2.5%
- Lazy Minting: Yes
- Royalties: up to 50%
- File Size Limit: 100 MB
- Currently Supported File Types: PNG, GIF, WEBP, MP4, MP3
Zora
- Compatible blockchain(s): Ethereum
- Platform Fees: 0%
- Lazy Minting: No
- Royalties: up to 100%
- File Size Limit: 500 MB
- Currently Supported File Types: any image, video, or audio file
SuperRare
- Compatible blockchain(s): Ethereum
- Platform Fees: 3% with an additional 15% at mint sale
- Lazy Minting: No
- Royalties: 10%
- File Size Limit: 50 MB
- Currently Supported File Types: PNG, JPEG, GIF, MP4 (H.264 or X.264 codec), GLB
As we get into the next section and you start thinking about how to make NFT art, remember to consider file size limits and supported files across marketplaces.
Step 2: Design Your NFT Concept
You don’t have to be a conventional artist to learn how to make an NFT. Your NFT could be a five-second musical piece composed in GarageBand or pixel art designed in Microsoft Paint. Maybe you create an original meme at the forefront of the internet’s next inside joke. Or you could finally help your parents clean out the attic, dust off that childhood artwork, and make it digital. Whatever your preference, these next steps will help narrow your focus.
Choose Your Medium
Consider your artistic talents, and think about the tools you have and could use to create your NFT. Rather than buy or learn new software, it’s helpful to work with tools already at your disposal.
If you’re not sure where to start, here are some free options:
- Canva: Drag-and-drop design tool with free and pro versions available online
- Blender: 3D animation tool available for download on Windows, macOS, Linux, and Steam*
- Sketchbook: Sketching, painting, and drawing app available for download on Windows and IOS
- GarageBand: Music creation available for download on IOS*
- Cakewalk: Music creation available for download on Windows*
*Be mindful of system requirements and potential learning curves.
Identify Your Target Audience
Because of the anonymity afforded by blockchain transactions, you can’t identify your audience in the traditional sense. However, you can determine what interests your target audience holds based on marketplace and social media trends in the NFT space. For example, suppose you go the meme route; your target audience will likely want something funny and fresh that builds on existing trends.
Offering Unlockable Content for Your Target Audience
Unlockable content can be made available to buyers who have purchased your NFT. This means, that after purchase of the NFT, the buyer can gain access to content, files, or links that were hidden to the general public. This content only becomes accessible after purchase. Common examples of unlockable content include access to private Discord servers, free airdrops, and redemption keys for digital or tangible rewards.
While everyone can offer rewards for NFT purchases, it may not be sought after in your first NFT project. But as you grow your NFT community - more on that later - ideas for unlockable content should become more clear, like offering voting power in the future of a project.
Scope Your Competition
As you narrow down your NFT concept, search for similar projects or creators in the space. Your time is valuable, so don’t waste hours of hard work because you didn’t realize your NFT would be competing in an overly-saturated market area.
Learn from popular trends amongst similar projects, but don’t replicate the most popular artists in your space. Your art can cater to existing trends while standing out amongst the competition.
Finetune Your Concept
You’ve chosen a medium, understand what your target audience responds to, and scoped out the competition. Now take all of that research and channel it into a concrete idea, which you'll finalize by setting attainable goals for yourself.
As you narrow your concept and prepare to mint, keep accessibility in mind. For instance, if your NFT has audio, consider including subtitles for instrumentals and speech.
Step 3: Mint and Sell Your NFT
Minting is the process of putting your NFT on the blockchain. Depending on the platform, you'll need to mint before you list your NFT art for sale. As mentioned earlier, minting processes and associated fees will vary. Individual marketplaces detail their process and fees on resource pages or in their help centers.
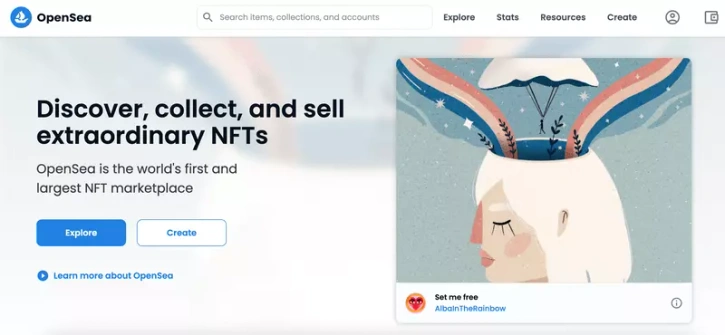
Typically, you'll connect your wallet and click "create" somewhere on the homepage. See the below example from top NFT marketplace, OpenSea. Multiple "Create" options are prominently displayed in the top right and middle of the page.
You'll then be directed to an upload page for your file with information fields that change depending on the platform, but you’ll always be required to enter an item name, set a price, and have the option to add a description.
Standard Options for Creating an NFT:
-
Collection
You can specify the collection to mint in if you’re minting an NFT as part of a more extensive collection.
-
Single or Multiple
You can choose to sell your NFT as a single item or to create multiple copies or editions of the NFT. If you select multiple, you’ll have an option to specify the number of copies.
-
Supply
Some marketplaces have you enter a supply number instead of choosing between single or multiple editions.
-
External Link
Use an external link to tell potential buyers more about you by linking to your portfolio or social media.
-
Properties
Properties can encompass any traits that apply to your NFT art. On OpenSea, properties can only be textual traits. They’re commonly used in collections to assign rarity and typically have two fields. For example, you could write ‘Class’ in the first field and ‘Archer’ in the second to give your NFT the class of Archer. You can view our rarity tools to explore properties by NFT projects - from the NFTs drop down on LuckyTrader.com, choose a project then select "Rarity" in the top left.
-
Levels and Stats
You’ll encounter these on OpenSea, and like properties, they’re mostly applicable to collections. Rather than textual traits, levels and stats deal with numerical characteristics. Levels show as a progress bar on your listing and stats show as numerical values.
-
Unlockable Content
Here you can enter redemption codes or access keys if you’re offering additional content or rewards to your NFT buyers.
-
Explicit and Sensitive Content
This field is typically a box you check. If your art is not safe for work (NSFW), mark it as explicit to protect users browsing marketplaces who don’t want to view sensitive content.
-
Alternative text
Here you can enter image descriptions and make your NFT art more accessible to those with disabilities.
If you aren't lazy minting, you'll have to pay for gas and platform fees after you've finished with this step.
Methods for Selling Your NFT
Some platforms require pricing and royalty information before you create your NFT, and others will request that information after. You'll choose between the following options:
-
Fixed Price
You list at a specific price and wait until someone buys at that price. Some marketplaces allow time limits on fixed-price sales. -
Timed Auction
You decide how long your NFT will be listed, and buyers place bids within that window. The highest bidder at the end of the auction receives your NFT. -
Unlimited Auction
Unlimited auctions are nearly the same as timed auctions; the significant difference is that you decide when you’re content with the offer and end the auction.
Most likely, you’ll want to choose a fixed-price sale for your first NFT, but how should you decide your fixed price?
How to Price Your NFT
To determine a price for your NFT, you can evaluate sales for similar art, but be careful comparing your prices to creators with large followings in the space. Creators with similar projects consistently selling at high prices likely built up their community and spent a lot of time establishing themselves.
In the next section, we’ll cover ways you can do the same. But for now, avoid overpricing your work when pricing by comparison.
It’s helpful to start by determining your baseline costs. What does it cost you in marketplace fees and gas fees to mint and sell your NFT? If you price under that number, you're guaranteed to lose money. Price your NFT accordingly based on the fees associated with production.
Step 4: Build a Community
If your goal is to gain a greater audience in this space, you must work on expanding your connections with those actively collecting, buying, and selling NFTs. By working on community growth from the start, your community will, ideally, grow with your projects and collections.
Get Active on NFT Twitter and in Discords
You can use your personal account, or if you want to keep your personal life and NFT life separate, establish yourself under a pseudonym. Explore Twitter hashtags like #NFTCommunity and #NFTCollector to start finding people active in the space.
Follow projects you’re passionate about and support other creators. Interact with your potential audience too. People are more inclined to buy from NFT artists they know, respect, or have conversations with compared to strangers with a similar following.
Most importantly, share your art!
Don’t worry about only posting finished products. Sharing your artistic process has the potential to be more personal and relatable than finished projects alone.
As for Discord, there are tons of NFT dedicated servers for discussing projects, and you can learn about the top NFT Discord servers here. Some servers have thousands of members, making growing your number of connections in the space effortless. The hard part is strengthening those connections through authentic interactions.
It’s worth mentioning that Reddit and Instagram also have growing NFT communities, but Twitter and Discord are usually the best places to start.
Define a Shared Vision
Strong NFT communities rely on a sense of mutual effort directed at some larger goal. How do you want the future of your project or collection to look? What steps do you need to take to get there? Once you’ve identified those long-term goals, start brainstorming how you can involve your community in meeting them.
Encouraging community involvement can strengthen your groups’ numbers and longevity while helping you realize your project’s potential. Projects with active creators encouraging community involvement can be more appealing than others because they feel more trustworthy. Without community support as a testament to your credibility, you’ll likely struggle to develop in the space.
Step 5: Create More NFT Art
You’ve done it! You’ve learned how to make an NFT and created your first piece, so what’s next? If you want to keep creating NFTs and growing your presence, then utilize sales metrics and community feedback to make necessary adjustments as you advance.
Flexibility is paramount in your NFT journey. If what you’re doing isn’t working, it’s time to change something. You could find yourself struggling to sell or unable to increase community involvement regardless of effort. In that case, go back to the drawing board and rework your concept - if you haven't already tried dropping the price. Focus on reworking goals and expectations for your project. Then hone that shared vision that binds communities together.
If your community and audience grow steadily, keep that momentum. Consider investing profits towards elevating your following pieces or offering greater utility for your community. You could buy better software in your preferred medium, implement appealing unlockable content, or even hire a marketing agency.
Whether or not you decide to continue making NFT art, be proud of the knowledge and experience you’ve gained from following this comprehensive guide and for learning how to make an NFT.